Perth's Best Kitchen Splashback Resurfacing Options for 2026
.png)
-2-2.jpg)
Kitchen splashback resurfacing in Perth: a smart way to refresh without a full reno
Your splashback does more work than most people realise. It cops the steam from your stovetop, the odd curry splatter, the morning coffee rush and all the wiping that follows. When it starts to look tired, stained or dated, the whole kitchen can feel a bit flat, even if the rest of the space is in decent shape.
If you are in Perth and you are looking at your tiles or glass and thinking, “This makes the whole kitchen look old,” you are not alone. A full renovation is not always practical. It can mean weeks of trades in and out, unexpected costs, and a lot of disruption to family life or business operations.
This is where kitchen splashback resurfacing comes in.
Resurfacing gives your existing splashback a new, hard-wearing finish, so it looks fresh and modern without the cost and demolition that come with replacement. For many Perth homeowners and commercial property managers, it is the middle ground between “live with it” and “rip it all out”.
What your splashback really does in a Perth kitchen
A splashback is not only a decorative strip behind your cooktop. It has two important jobs.
- Protecting your walls from moisture, heat, oil and food splashes, so you are not constantly repainting or patching.
- Setting the tone of the kitchen, because it often runs the full length of the benchtop and sits at eye level.
In many Perth homes, splashbacks are made of tiles, laminate, glass or a combination of these. Over time they can show their age through:
- Outdated colours or patterns that no longer match the rest of the home
- Stained or discoloured grout lines
- Chips, hairline cracks or worn edges around power points
- Surface dullness that does not improve no matter how much you clean
In commercial kitchens and staff break rooms, the problems are similar, but often more visible because of higher traffic and more frequent cleaning.
When the splashback is tired, the whole space feels tired.
Why keeping your splashback in good shape matters
Visual impact
Your splashback usually runs a long, continuous line across your kitchen. If it looks dated, busy or worn, it draws the eye straight away. Fresh cabinetry and a new benchtop will not look their best against a stained or cracked splashback.
On the flip side, a clean, modern splashback finish can lift older cabinets and benchtops, making the whole kitchen feel more current without changing the layout.
Function and hygiene
Perth’s climate, with humid summer days and cooler winter mornings, is tough on kitchen surfaces. Steam and condensation can find their way into small cracks, unsealed grout or failing silicone, which can lead to staining and, in some cases, odours or mould growth in problem spots.
A well maintained splashback helps with:
- Easy cleaning, with smooth sealed surfaces that wipe down quickly
- Better hygiene, since there are fewer places for grease and grime to settle
- Longer life for the wall behind, because moisture is kept out
If your splashback is structurally sound but cosmetically poor, resurfacing can restore that protective barrier and improve day to day cleaning without the cost of putting in new tiles or panels.
What is kitchen splashback resurfacing?
Kitchen splashback resurfacing, sometimes called refinishing, is a process that renews the surface of your existing splashback rather than removing and replacing it.
In practical terms, a professional will:
- Clean and prepare the existing surface so coatings can bond properly
- Repair minor chips or imperfections where possible
- Apply specialist resurfacing coatings, paints or finishes suited to kitchens
- Allow the surface to cure so it hardens and becomes durable
The result is a splashback that looks refreshed and is easier to keep clean, while your existing wall structure and layout stay exactly the same.
For Perth homes and commercial spaces, resurfacing is often used on tiled splashbacks that have strong bones but tired colours, or on laminate that is sound but dated. It can also work alongside cabinet and benchtop resurfacing, so the whole kitchen ties together without a full gut and rebuild. If you are exploring a full kitchen refresh, you may find it useful to read more about kitchen resurfacing in Perth and how splashbacks fit into that picture.
Why resurfacing is a practical alternative in Perth
Less disruption to daily life or business
Replacing a splashback often means removing tiles or panels, dealing with dust and debris, then arranging a tiler or installer and sometimes a painter or electrician. In a busy family kitchen or a commercial setting, that can be a lot of interruption.
Resurfacing avoids demolition in most cases. The work usually happens over a much shorter window with less mess, no need to remove cabinetry, and far less risk of unexpected issues behind the wall.
Cost conscious without looking “cheap”
Many Perth property owners want their kitchen or staff area to look fresh but need to keep a close eye on budget. Resurfacing lets you direct your money toward visible finishes rather than structural work you will never see.
Because the existing surface stays in place, you avoid costs linked to disposal, re-sheeting walls or re tiling in full. You still get a neat, modern finish, especially when splashback resurfacing is combined with cabinet and benchtop refinishing as a coordinated project.
Suited to Perth’s property mix
Across Perth you will see a wide mix of housing ages and styles, from older brick homes with small tile splashbacks to newer builds with larger format tiles or panels. Many of these kitchens are solid and functional, they just need a visual refresh.
Resurfacing works well in this context. It respects what already exists, avoids unnecessary waste, and lets you update colours and finishes so your kitchen feels more aligned with current styles or with the rest of your home.
Who is kitchen splashback resurfacing for?
From what we see in Perth, splashback resurfacing appeals most to three groups.
- Homeowners who want a fresh look without a major renovation. You might like your kitchen layout, but the tiles, grout or colours are dated.
- Owners comparing resurfacing and replacement across the whole kitchen. You may already be looking at resurfacing for cabinets, benchtops or tiles and want the splashback to match.
- Commercial property managers and business owners. You may need a quick, tidy improvement to staff kitchens, lunchrooms or commercial food prep areas without shutting down operations for long periods.
If you recognise yourself in any of these, splashback resurfacing is worth considering as part of a broader kitchen or bathroom refresh plan. For a deeper overview of how resurfacing applies across different areas of the home, you can explore our residential resurfacing services in Perth.
In the next sections of this guide, we will step through how splashback resurfacing actually works, what materials are commonly used in Perth, how it compares to full replacement, and what to think about before you commit to a project in 2026.
Understanding kitchen splashback resurfacing in Perth
Before you decide if resurfacing is right for your kitchen, it helps to understand exactly what it is, what materials are involved, and what is included in a proper splashback resurfacing service in Perth.
Think of resurfacing as giving your existing splashback a new outer skin. The structure stays, the layout stays, but the visible surface and protective coating are renewed so the area looks cleaner, more modern and is easier to maintain.
What “resurfacing” actually involves
Kitchen splashback resurfacing is a multi step process that upgrades the finish on your existing surface. It is not a quick DIY paint job. When done properly, it follows a structured method to make sure the new finish bonds well and stands up to daily use in a working Perth kitchen.
A typical professional resurfacing process for splashbacks will include:
- Assessment of the existing splashback, to check that the tiles, glass or laminate are secure, and that there are no major structural issues or movement in the wall.
- Thorough cleaning and degreasing, to remove built up cooking oils, cleaning product residue and any contaminants that would interfere with adhesion.
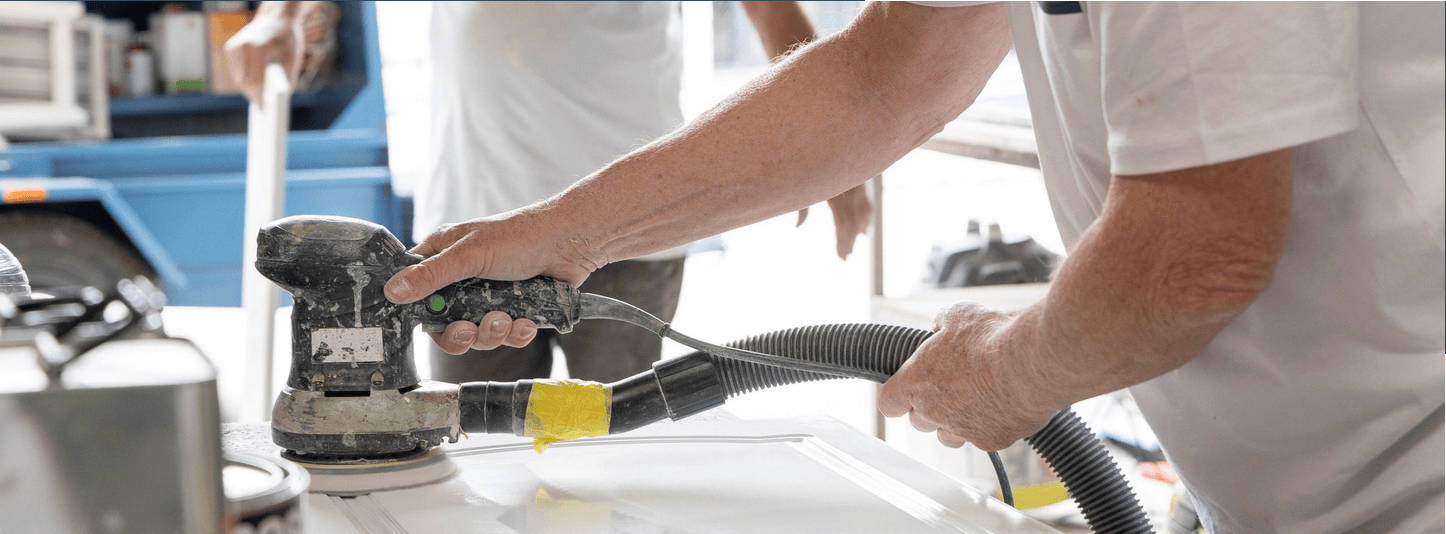
- Light surface preparation, such as fine sanding or abrading, so the new coatings can grip the existing surface properly.
- Minor repairs, for small chips, hairline cracks and imperfections where appropriate, using compatible fillers or patching products.
- Masking and protection, with surrounding benchtops, cabinets, appliances and floors carefully covered so overspray or splatter does not affect the rest of the room.
- Application of specialist primers, chosen to suit the base material, for example tile, laminate or certain types of glass panel.
- Application of the resurfacing topcoats, often sprayed for an even finish, in the colour and sheen level you have selected.
- Curing time, where the surface is left to harden so it becomes durable and ready for normal kitchen use.
- Final inspection and clean up, including removal of masking tape and a check for drips, rough spots or other small defects.
When each stage is done with care, you end up with a splashback that looks newly installed even though the original structure is still behind it.
Typical materials used for splashback resurfacing in Perth
Perth kitchens use a mix of materials for splashbacks, and the resurfacing approach is tailored to each one. Below are the main types you will see and how resurfacing usually works with them.
Tiled splashbacks
Tiled splashbacks are very common in Perth homes of various ages. These often have strong backing and grout, but the tile colour or pattern has dated.
For tiles, a professional resurfacing system usually involves:
- Heavy duty cleaning, to remove grease from grout lines and the tile surface.
- Tile and grout priming, with a bonding primer that grips both materials.
- High performance coatings suitable for vertical tiled surfaces in wet or steamy areas.
The new finish can visually reduce the look of grout lines, smooth out colour variations and provide a more uniform appearance. You still have the tile pattern under the surface, but the overall impression is consistent and modern.
Laminate splashbacks
Many older and mid range Perth kitchens use laminate or compact board as a splashback. These are often in good structural condition, but the colour or print looks tired.
With laminate, the resurfacing process focuses on:
- Thorough decontamination, since laminate can hold onto cleaning product residue.
- Fine sanding or scuffing, to create a key for the primer.
- Specialist primers and coatings that adhere to smooth, non porous surfaces.
The end result is a fresh, solid colour or stone look finish without removing the laminate sheet.
Glass or acrylic panels
Some Perth kitchens have glass or clear acrylic panels as splashbacks. These can often be resurfaced from the face side if the back painting or colour is failing, provided the surface is well prepared and the right primers are used.
This work usually relies on:
- Gentle, thorough cleaning, taking care not to scratch clear surfaces.
- Specialist adhesion promoters suited to glass or plastic.
- Careful spray application, to maintain a smooth, reflective finish.
Not every glass splashback is suitable for resurfacing, so a proper site assessment is important before committing.
How resurfacing actually rejuvenates a splashback
From a practical point of view, resurfacing rejuvenates your splashback in three main ways.
1. Fresh colour and style
The new coating covers old colours, patterned tiles, stains and discoloured grout. You can move to a more neutral palette, match newer cabinets or benchtops, or align with the rest of your home.
For Perth properties, this is useful if you are moving away from strong colours or older tile designs toward calmer tones that suit open plan living or resale goals.
2. Smoother, easier to clean surfaces
Once resurfaced, your splashback has a continuous, sealed finish. This helps in areas where grout lines used to trap grease, or where small pits and chips collected grime.
Daily cleaning becomes a quicker wipe down rather than heavy scrubbing, which is a relief in busy family kitchens and commercial staff areas.
3. Restored protective barrier
Resurfacing re establishes a protective layer between cooking activity and the wall behind. When paired with sound grout and silicone, it reduces the risk of moisture getting into the wall surface, which can help the whole kitchen structure last longer.
Scope of work in a typical Perth splashback resurfacing service
Not every resurfacing provider includes the same tasks, so it helps to have a clear picture of what is generally part of a professional splashback job. This allows you to compare quotes and avoid surprises.
A comprehensive splashback resurfacing service will typically include:
- Initial inspection and discussion, to confirm the surface is suitable for resurfacing and to agree on colour, finish and any extras you want.
- Surface preparation and repair, including cleaning, minor patching, sanding and masking of surrounding areas.
- Priming and coating, with systems matched to your splashback material and your kitchen conditions.
- Curing time guidance, so you know exactly when you can start using the area again and how to treat the surface during the first period after application.
- Clean up and handover, with protective coverings removed and the area left tidy.
Some providers may also offer:
- Coordinated work on cabinets and benchtops, so the splashback resurfacing is part of a broader kitchen refresh. If you are planning a full surface update, it can be helpful to look at kitchen benchtop resurfacing options in Perth at the same time.
- A written warranty on workmanship and coatings for eligible surfaces, which gives peace of mind that the finish is expected to last when you follow the care instructions.
What resurfacing does not cover
Understanding the limits of resurfacing is just as important as knowing what it can do. In most cases, resurfacing will not include:
- Major structural repairs to walls or framing behind the splashback.
- Significant tile replacement, apart from occasional minor patching if agreed in advance.
- Relocating power points, plumbing or fixtures, which usually requires other licensed trades.
- Correcting movement or warping in walls or substrates that are not stable.
If these issues are present, they generally need to be addressed before resurfacing, or you may need to consider partial replacement in those sections.
Why technique matters as much as materials
The products used in resurfacing are important, but the method is just as critical. In Perth’s climate, with heat, humidity and regular cleaning products to contend with, poor preparation or rushed application can lead to peeling, bubbling or early wear.
A skilled resurfacing technician will take time with the boring steps, such as masking, sanding and cleaning, because these are what give the topcoat the best chance to bond well and last. The visible spray work is only part of the story.
If you are comparing providers, it is worth asking them to walk you through their process from start to finish. A clear, detailed explanation is usually a good sign that the technique behind the job is well thought out.
Who kitchen splashback resurfacing in Perth is really for
Not every Perth property needs resurfacing. Some kitchens are due for a full structural renovation. Others only need a light cosmetic lift. This section focuses on the people who sit in the middle, where splashback resurfacing offers a sensible, budget aware option.
In Perth, we usually see three main groups considering splashback resurfacing and related services.
- Homeowners who want an affordable kitchen upgrade without major building work
- Owners comparing resurfacing with full replacement across cabinets, benchtops, tiles and baths
- Commercial property managers and business owners who need quick, low disruption refreshes
If you recognise your situation in any of these, resurfacing is worth a closer look.
Perth homeowners wanting a fresh kitchen without a full renovation
Many Perth homeowners like their kitchen layout but feel unhappy with how it looks. The cupboards still work, the benchtops are sound, and the appliances do their job, but the splashback and other surfaces feel tired or stuck in another decade.
Typical signs you sit in this group include:
- You avoid taking photos in the kitchen because the tiles or colours look dated.
- You are frustrated with stained grout or surfaces that never look truly clean.
- You want a lighter, more modern feel without changing walls, plumbing or electrics.
- You do not want weeks of tradies in the house or to lose access to your kitchen for long periods.
- You have a set budget and want to see visible change for the money you spend.
For these homeowners, splashback resurfacing ticks some important boxes.
- Low disruption, as there is no demolition of the existing splashback in most cases.
- Cost control, because you keep the existing structure and focus on surface finishes.
- Visual impact, since the splashback covers a large, eye level area of the kitchen.
- Flexibility with colour, so you can choose something that works with your current cabinets and flooring.
You might also be weighing up whether to update other areas at the same time, such as cabinets or benchtops, to create a more cohesive result. If that is the case, it can help to read broader guides on smart kitchen resurfacing options in Perth and how each surface fits into the full picture.
The key need here is a noticeable improvement in how the kitchen looks and feels, without the cost, mess and downtime that come with a full strip out.
Homeowners comparing resurfacing vs replacement across the whole home
Another group includes Perth owners who are not just thinking about the splashback. They are looking at cabinets, benchtops, floor tiles, bathroom tiles, vanities and even laundries, and trying to decide what to resurface and what to fully replace.
If you are in this group, you are likely asking questions such as:
- Is it better to resurface my kitchen cabinets or replace them outright?
- Will a resurfaced benchtop stand up to my household’s daily use?
- Does it make sense to resurface bathroom tiles and baths at the same time as the kitchen?
- Where will resurfacing give me the best balance of cost, durability and appearance?
Your priorities often look like this.
- Maximising your budget, by choosing where resurfacing gives good value and where replacement is still needed.
- Consistency of look, so your splashback, cabinets and benchtops all work together rather than looking like separate, mismatched projects.
- Simple project coordination, with one team handling several areas instead of multiple contractors arriving at different times.
- Solid information on durability, including clear warranties and honest advice about what will and will not last in Perth conditions.
In practice, these owners often map out their house by surface type and ask for separate pricing and options for each, for example:
- Kitchen splashback, cabinets and benchtops
- Bathroom wall tiles, vanity top and bath
- Laundry benchtop and splashback tiles
This lets you mix and match resurfacing and replacement to suit your budget and plans. For instance, you might resurface sound bathroom tiles and vanities, but replace a failing shower screen or a cracked benchtop. You might keep a solid stone benchtop but resurface the splashback and cabinets around it.
If you are thinking beyond the kitchen, it can help to read about related services such as bathroom resurfacing in Perth or laundry refinishing, then decide where splashback work fits into your sequence.
The key need here is clear comparison. You want honest, side by side information on resurfacing versus replacement for each surface type, so you can plan a staged or whole of home refresh that makes financial sense.
Commercial property managers and business owners in Perth
The third major audience for splashback resurfacing is commercial. This includes offices, staff kitchens, shared facilities, hospitality venues and accommodation providers across Perth.
Your situation is different from a homeowner’s. You often manage multiple stakeholders and have to work around business hours, tenancy agreements and compliance requirements.
If you are in this group, your concerns usually include:
- Downtime, since closing a kitchen, staff room or food prep space affects staff and customers.
- Cleanliness and safety, with a need to keep work areas tidy and safe during any upgrade work.
- Presentation standards, where tired or stained splashbacks can affect perceptions of hygiene and professionalism.
- Predictable costs, as you often work within set budgets or need to present costings for approval.
- Simple logistics, including access, parking, lift use and timing around other building users.
For commercial spaces, resurfacing often appeals because it:
- Reduces demolition noise and debris compared with full replacement.
- Can often be scheduled in shorter windows, such as after hours or over quieter trading days.
- Improves the appearance of key areas like staff kitchens, lunchrooms and guest kitchenettes without large capital works.
- Can be combined with resurfacing of benchtops and cabinetry to present a neat, cohesive finish.
Commercial property managers usually appreciate clear, itemised quotes, written scopes of work and well defined curing times, so they know exactly when an area will be back in action. Many also look for providers who can handle both residential style apartments and fully commercial facilities, and who understand the specific expectations in each setting. If this sounds like you, it may be useful to look at broader commercial resurfacing services in Perth to see how splashback work fits into larger projects.
The key need here is a tidy, reliable upgrade that respects business operations. You want a practical, good looking finish, a clear plan for timing, and minimal disruption for tenants, staff or guests.
What all three groups have in common
Although these audiences are different, they tend to share a few priorities when it comes to kitchen splashback resurfacing.
- Value for money rather than the absolute lowest price. Most people would rather pay a fair rate for a finish that lasts, than go cheap and redo it sooner.
- Clear communication about what can and cannot be resurfaced, how long it takes, and how to care for the new surface.
- Minimal disruption to normal life or business, with the kitchen or staff area out of action for the shortest practical time.
- A quality finish that looks built in, not like a quick paint job applied as an afterthought.
- Local knowledge about Perth homes, building types and climate, so advice is realistic and suited to local conditions.
If your needs match some or all of these, splashback resurfacing is likely worth investigating further as part of your 2026 property plans.
Benefits of kitchen splashback resurfacing in Perth
Once you know what resurfacing is, the next step is to weigh up whether it is actually worth it for your Perth property. This section breaks down the main benefits so you can compare resurfacing with full replacement in a clear, practical way.
1. Cost savings compared with full replacement
The biggest drawcard for most Perth owners is cost control.
When you replace a splashback, you pay for much more than the visible tiles or panels. Replacement often involves:
- Demolition of existing tiles or panels
- Rubbish removal and disposal fees
- Wall repairs or re sheeting if the substrate is damaged
- New tiles, glass or panels
- Tiling, grouting and possibly painting around the area
- Extra trades if power points or fixtures need to be adjusted
With resurfacing, you keep the existing structure in place. The focus is on skilled preparation and specialist coatings, rather than pulling everything out and starting again. This usually means:
- Less labour compared with a full remove and re tile job
- No wall re sheeting in most cases, since the backing stays intact
- No tile or glass purchase costs, because you reuse the original surface
- Lower associated costs, such as patching paint or replacing damaged cornices
If you are planning a wider refresh, such as resurfacing cabinets and benchtops at the same time, splashback resurfacing can help you stretch your budget further. You put your money into visible improvements across more areas, rather than into demolition and rebuilding one zone.
If you want a deeper dive into budgeting for different kitchen surfaces, you can read our guide on kitchen resurfacing costs in Perth for 2026 and beyond.
2. Faster turnaround and time efficiency
Time is a big factor for busy Perth households and commercial sites.
A full splashback replacement can stretch out while you coordinate tilers, painters and other trades. In some cases, work stops while walls dry or while you wait for materials to arrive.
Resurfacing compresses the process. Once the area is booked in, a typical splashback job follows a clear sequence.
- Preparation on day one, including cleaning, repairs and masking
- Priming and coating in a controlled, planned window
- Curing over a set period, during which you follow simple use guidelines
There are fewer moving parts to coordinate, since one team manages the full process. You also avoid long gaps waiting for new tiles or panels to be delivered, which can delay replacement projects.
For commercial properties, time efficiency is even more important, because downtime affects staff and customers. A resurfacing schedule can often work around quieter times, such as evenings or specific days, so you get an upgrade without extended closures.
3. Environmental benefits and reduced waste
Many Perth homeowners and businesses are looking for ways to improve their spaces while being more mindful of waste. Resurfacing supports that goal.
When you resurface a splashback:
- You keep existing tiles, glass or laminate out of landfill because the base material stays on the wall
- You reduce the need for new materials such as tile batches, grout bags and backing boards
- You avoid demolition waste including broken tiles, old adhesives and damaged wall lining
Instead of sending a whole splashback to the tip because of colour or cosmetic wear, you extend its life by renewing the surface. For many Perth properties, the only issue with the existing splashback is appearance. Resurfacing tackles that problem directly without discarding materials that still have structural life left in them.
If you are planning a broader refresh across your home, you can take the same reuse first approach with areas like laundries and bathrooms. Our overview of laundry resurfacing in Perth shows how this works in other wet zones as well.
4. Versatile design and colour options
Resurfacing is not about “making do”. It gives you real design choice.
Modern resurfacing systems for splashbacks come in a wide range of colours and finishes, so you can tailor the look to your home or commercial space.
Common options include:
- Solid colours, from crisp whites to deeper charcoals and warm neutrals
- Soft, stone inspired looks, which work well with both light and dark benchtops
- Different sheen levels, typically satin, semi gloss or gloss, chosen to suit your lighting and cleaning preferences
Because the coatings are sprayed or carefully applied, you can often reduce the visual impact of busy grout lines or patterned tiles. The splashback reads as a more unified plane of colour, which tends to make kitchens feel calmer and more modern.
Design flexibility is especially handy if you are:
- Trying to coordinate older cabinets with a newer benchtop
- Preparing a property for sale and want a neutral, broadly appealing look
- Updating a commercial space to align with brand colours without expensive joinery changes
If design trends matter to you, it can be useful to look at our recent insights on 2026 resurfacing styles for Perth kitchens, which cover popular tones and finishes across local homes.
5. Durable, hard wearing finish suited to Perth kitchens
There is a common concern that resurfacing is “just paint”. In reality, professional resurfacing systems are purpose built for kitchen and bathroom environments.
When applied correctly, these coatings are designed to:
- Handle daily cleaning with suitable non abrasive products
- Resist moisture and steam in typical cooking conditions
- Cope with temperature changes in Perth’s climate, from warm summer evenings to cooler winter mornings
- Maintain colour and sheen when used and cared for as directed
Professional resurfacing providers usually back this up with a written warranty on workmanship and coatings for eligible surfaces, often for a period of up to [insert length] when you follow the recommended care guidelines. This gives you confidence that the finish is intended to last, not just look good on day one.
Durability is especially important in rental properties and commercial spaces, where surfaces are cleaned often and used by many different people. A quality resurfacing system with proper preparation will handle regular wiping and the usual knocks far better than a quick DIY paint solution.
6. Minimal disruption to daily life or business operations
One of the biggest advantages of resurfacing in Perth is how little it interrupts your routine.
For homeowners
In a typical home kitchen, resurfacing work is contained to the splashback area and immediate surrounds. There is no tile chipping, no removal of cabinetry and no large piles of rubble to manage.
This usually means:
- You keep access to most of the kitchen during the project
- Noise and dust are limited, compared with demolition work
- Masking protects benchtops, appliances and floors from overspray
- Curing times are clear, so you know when you can use the cooktop and sink again
For families, that can be the difference between a few planned takeaway nights and feeling like you are living on a building site.
For commercial properties
In offices, hospitality venues and shared facilities, disruption costs money. Resurfacing helps keep things running by:
- Reducing intrusive demolition processes that affect neighbouring areas
- Allowing work to be arranged in blocks that suit trading or office hours
- Making it easier to keep pathways and adjacent spaces clear and safe
With a clear schedule and good communication, staff and tenants know what to expect, where they can move, and when full access returns. For sites with multiple kitchens or amenities, work can be staged so some areas stay open while others are resurfaced.
7. Flexible enough for staged upgrades
Many Perth owners do not want, or need, to tackle the whole kitchen at once. Resurfacing supports a staged approach.
You might choose to:
- Resurface the splashback as a first step, then plan cabinets and benchtops for a later date
- Coordinate splashback work with a benchtop or cabinet project so the finishes line up
- Start in a secondary kitchen or staff area, then move to the main kitchen once you are happy with the look and process
This flexibility can make budgeting less stressful, since you are not committing to full replacement costs across several areas in one hit. It also helps you keep some spaces fully operational while others are being updated.
8. A finish that looks “built in”, not like a quick fix
When done properly, splashback resurfacing does not need to look like a temporary band aid. With good preparation, skilled spraying and the right coating system, the finish sits cleanly against benchtops, cabinets and fixtures, so it feels like a planned part of the kitchen.
Key signs of a professional result include:
- Even colour and sheen with no obvious roller marks or patchiness
- Clean lines at benchtops, cabinets and edges, thanks to careful masking
- No heavy build up in corners or around power points
- A smooth feel that holds up to gentle cleaning and daily use
For homeowners and commercial managers alike, this quality of finish is what makes resurfacing a serious alternative to replacement rather than a short term cover up.
In the next section, we will compare resurfacing and full replacement side by side, so you can see which option fits your kitchen, bathroom or commercial space in Perth.
Resurfacing vs replacement for Perth kitchen splashbacks: pros and cons
Once you know what resurfacing involves, the next logical step is to compare it with full replacement. Both options have a place in Perth kitchens and commercial spaces. The right choice depends on your budget, time frame, how you use the kitchen and the current condition of your splashback and surrounding surfaces.
This section walks through resurfacing and replacement side by side so you can see where each approach fits best.
1. Cost comparison
Resurfacing costs
With resurfacing, you are paying for skilled labour, preparation and specialist coatings. You are not paying for demolition or new tiles or panels. That shift in where the money goes is why many Perth owners find resurfacing more budget friendly.
Typical cost drivers for resurfacing include:
- Size of the splashback, since larger areas need more coating and more time
- Number of repairs needed, such as chips or small cracks that must be patched
- Material type, for example, tile versus laminate versus certain glass panels
- Access and layout, including corner returns, rangehoods and power points
- Chosen finish, such as standard solid colour or a more detailed stone style finish
Resurfacing usually works well when you want a clear, predictable spend that keeps demolition and rebuild costs out of the equation. Many Perth owners use it to refresh several areas at once, for example splashback plus cabinets, and still stay within a set budget. If you want a broader cost overview across surfaces, you may find our guide on budget friendly resurfacing options in Perth useful as a companion read.
Replacement costs
Replacement costs are made up of more moving parts. You are typically looking at:
- Removing existing tiles or panels
- Disposal fees for rubble and old materials
- Wall repairs or new wall lining if the substrate is damaged
- New tiles, glass, acrylic or other splashback material
- Installation labour, grouting and sealants
- Potential repainting around the new splashback
- Extra electrical or plumbing work if power points or fixtures must move
Replacement starts to make more sense if the wall behind is failing, if many tiles are loose, or if you want to change the shape or size of the splashback itself. In those situations, you are not just paying for looks, you are also rebuilding part of the structure.
Cost summary: Resurfacing usually provides better value when the existing splashback is sound but dated or stained. Replacement is better suited when you have structural issues or want a different layout altogether.
2. Project duration and timeline
Resurfacing timelines
Because resurfacing keeps the existing surface in place, project timelines are simpler and often shorter.
A typical resurfacing schedule for a Perth splashback might look like this framework:
- Day [insert step] Preparation, repairs, masking and priming
- Day [insert step] Topcoat application and initial curing
- Following [insert period] Light use with care while the surface fully hardens
Exact timing depends on the coatings used and ambient conditions, but you are usually dealing with a clearly defined, compact window. One team handles every step, so you are not juggling different trades.
Replacement timelines
Replacement takes longer because more tasks and trades are involved. A typical replacement process can include:
- Demolition and removal of the old splashback
- Substrate inspection and repair or re sheeting if required
- Waiting time between trades, for example for walls to dry, then for tilers to arrive
- Tiling or panel installation
- Grout curing time
- Final silicone and any touch up painting
Any delay in materials or trade availability can push the timeline out. For busy Perth households and commercial sites, these gaps can turn what seemed like a simple change into a drawn out project.
Timeline summary: Resurfacing usually offers a tighter, more predictable schedule. Replacement can stretch out, especially if hidden damage appears once tiles come off or if you are coordinating several trades.
3. Disruption to daily life or business
Disruption with resurfacing
Resurfacing is contained. There is no tile chipping or bulk demolition. The work area is masked and protected, and dust is limited to light sanding rather than full wall removal.
For Perth homeowners, this typically means:
- You can still move through the kitchen while work is in progress, with some areas roped off
- Noise is present but usually far less intense than hammering tiles from a wall
- You plan for short periods where you avoid using the cooktop or sink, rather than weeks of major disruption
For commercial sites:
- Smaller areas can be treated in stages so staff always have some facilities available
- Work can often be scheduled around quieter periods, such as after hours or specific days
- There is less impact on neighbouring tenants, which is important in multi unit complexes
Disruption with replacement
Replacement is more intrusive by nature. Removing tiles or panels creates noise, dust and debris. Walls may be exposed for a period. Access around the area may be restricted while trades work, and you may lose use of parts of the kitchen or staff room for longer.
Extra disruption can also come from:
- Unexpected wall damage that needs repair before new tiles go on
- Changes in power point positions or plumbing that need licensed trades
- Waiting time while grout and adhesives fully cure
Disruption summary: If keeping your kitchen or staff area functioning is a priority, resurfacing generally wins. Replacement makes more sense when you are already planning a larger renovation and prepared for extended downtime.
4. Longevity and durability
Resurfacing durability
When done with proper preparation and quality coatings, resurfacing can hold up very well in Perth kitchens. The key is matching the system to the surface and following care instructions.
Factors that affect how long resurfacing lasts include:
- Preparation quality, especially cleaning and light abrasion before priming
- Product choice, such as coatings rated for kitchen use and local climate
- Application skill, so the film build is consistent and well bonded
- Aftercare, for example using non abrasive cleaners and avoiding harsh scrubbing pads
Reputable providers in Perth often support their work with a written warranty on eligible resurfaced splashbacks, typically in the range of up to [insert period]. That gives a practical reference point for expected life when the surface is looked after correctly.
Replacement durability
A fully replaced splashback with quality tiles or glass, installed on a sound wall, can also offer long service. In theory, it may last longer than resurfacing before any cosmetic work is needed.
However, its actual lifespan depends on:
- Tile or panel quality
- How well the substrate was prepared
- Grout and silicone maintenance over time
- Movement in the building or wall structure
Durability summary: A well resurfaced splashback with a proper warranty often gives more than enough service life for owners who expect to refresh their kitchen finishes again at some point. Full replacement leans toward those planning long term structural stability with minimal future changes.
5. Design, colour and material choices
Design flexibility with resurfacing
Resurfacing gives you strong control over colour, sheen and overall look. You can go from busy, patterned tiles to a calm, single tone finish, or tie an older splashback colour to newer benchtops and cabinets.
With resurfacing you can typically:
- Select from a broad range of solid colours and neutral palettes
- Choose a sheen level that suits your lighting and cleaning style, for example satin or gloss
- Opt for finishes that soften the appearance of grout lines and visual noise
Resurfacing works particularly well when you are trying to modernise without changing the layout. For Perth investors preparing properties for rental or sale, a neutral resurfaced splashback can sit comfortably with a variety of tenant furnishings.
Design options with replacement
Replacement opens up more structural choices, because you can change the material type, shape and layout of the splashback itself. You can:
- Switch from tiles to full sheet glass or large format panels
- Increase or decrease the height or width of the splashback
- Introduce feature tiles or intricate layouts if that suits your style
Of course, these options come with higher costs and more complex installation, but if you want a very specific tile pattern, grout colour or niche detail that resurfacing cannot replicate, replacement is the better fit.
Design summary: Choose resurfacing when you want a clean, modern, practical finish without reworking the structure. Choose replacement when your design goals involve changing the splashback material, size or layout from the ground up.
6. Suitability for typical Perth kitchen conditions
Perth kitchens and commercial spaces share some common environmental and usage patterns. Any splashback solution needs to cope with these.
Heat, steam and cleaning
Both resurfacing and replacement can handle normal kitchen heat and steam when done correctly.
- Resurfaced splashbacks use coatings designed for moist, warm environments. The key is sticking to the recommended distance between cooktop and splashback, and using suitable cleaners.
- Replaced splashbacks in tile, glass or appropriate panels also manage heat and steam, provided adhesives and sealants are specified for those conditions.
Older brick homes and unit kitchens
In older Perth brick homes and many units, walls can be a bit uneven and original tiles may be firmly attached. In these cases, resurfacing can be a smart choice, because:
- Removing old tiles may damage brittle plaster or render
- Wall repair and straightening can add unexpected cost and time
- The original tile base often has plenty of life left from a structural point of view
Resurfacing lets you work with what you have, avoiding a chain of extra works once demolition begins.
High traffic commercial and rental properties
Commercial kitchens, staff rooms and rentals in Perth take more daily wear.
- Resurfacing is appropriate when surfaces are sound and you want a fast, tidy uplift with minimal disruption. With good care guidelines provided to staff or tenants, resurfaced splashbacks can perform well in these settings.
- Replacement can be better where there is already significant damage, such as loose tiles, missing grout or repeated impact zones that need a change in material type or additional protection.
Suitability summary: In many typical Perth kitchens and light commercial spaces, resurfacing is suitable as long as the base surface is stable. Replacement makes more sense when structure is compromised, movement is present or a completely different splashback configuration is required.
7. When to choose resurfacing vs when to replace
Resurfacing is usually the better option if:
- The splashback surface is solid, with tiles or panels firmly fixed
- Your main complaint is appearance, such as colour, style or stained grout
- You want to minimise disruption to family life or business operations
- You are working to a set budget and want visible improvement for each dollar spent
- You plan to keep the existing kitchen layout
- You are refreshing several areas at once, such as cabinets and benchtops, and want all the finishes to tie together
Replacement is usually the better option if:
- Tiles are loose, cracked in many places or falling away from the wall
- The wall behind has moisture damage, movement or structural issues
- You want to alter the size or shape of the splashback, for example extend it higher
- You are changing the kitchen layout, such as moving appliances, sinks or windows
- You specifically want a material or layout that resurfacing cannot deliver, such as textured feature tiles or complex niche work
If you are still unsure which side your kitchen or commercial space sits on, it can help to have a professional inspect the splashback in person. A good resurfacing specialist will tell you plainly when replacement is the safer or more economical long term option. That kind of honest advice tends to save money and headaches down the track. You can learn more about how we approach that assessment in our Perth resurfacing FAQ.
8. How Perth owners can make a clear decision
To decide between resurfacing and replacement for your splashback, work through this simple decision framework.
- Check structural soundness
Press gently on tiles or panels, look for hollow sounds, and check grout and silicone. If large sections move or are missing, investigate replacement. - Clarify your goals
Are you mainly chasing a fresh, modern look, or do you need to fix known wall issues and change layout? Cosmetic goals lean toward resurfacing. Structural and layout changes lean toward replacement. - List your constraints
Note your budget range, ideal time frame and how much disruption you can tolerate. Compare these with the likely time and complexity of replacement. - Map your wider plans
Think about cabinets, benchtops, floors and nearby rooms. If you plan to refresh several surfaces, see where resurfacing can give you more scope within the same overall budget. - Get professional input
Ask for a clear written scope and quote for resurfacing, and if needed, a separate ballpark for replacement so you can compare like with like.
Once you have this information, the right option for your Perth splashback usually becomes clear. If your surface is sound and your focus is visual improvement with minimal interruption, resurfacing is often the practical choice. If deeper issues are present, replacement is the safer path, and you can still use resurfacing on other parts of the kitchen to keep the wider project affordable.
Materials and finishes popular in Perth splashback resurfacing
Once you decide resurfacing is on the table, the next big question is, what will it actually look and feel like? The materials and finishes you choose have a big impact on appearance, cleaning, and how well the splashback stands up to Perth’s heat and daily use.
This section walks through the main resurfacing materials used on kitchen splashbacks in Perth, how they perform, and how to match them to your lifestyle and property.
Key resurfacing systems used on Perth splashbacks
Most professional splashback resurfacing in Perth is based on one or a combination of these systems:
- Acrylic or polyurethane coating systems
- Specialist tile and laminate paints within a professional coating system
- Decorative and specialty finishes that mimic stone or other textures
- Occasional panel overlays in laminate or acrylic, used alongside coatings
The right choice for you depends on the existing surface, the look you want, how you use the kitchen, and how much maintenance you are comfortable with.
Acrylic and polyurethane coating systems
What they are
These are hard wearing, multi coat systems applied over properly prepared tiles, laminate or certain glass and acrylic panels. They are usually sprayed for a smooth, even finish and are specifically formulated for wet areas and high use kitchens.
Why they are popular in Perth
- Durability in warm, dry summers and cooler winters, with resistance to normal cooking steam and regular cleaning.
- Smooth, modern look that can calm busy tile patterns and grout lines.
- Wide colour range for both homes and commercial spaces.
- Good adhesion to common Perth splashback surfaces when combined with the right primers.
Typical finish options
- Satin for a soft, low reflection appearance that hides minor imperfections and fingerprint marks.
- Semi gloss for a light sheen that feels bright without showing every mark.
- Gloss for a glass like shine that reflects more light, often used in contemporary kitchens.
Perth homeowners often choose satin or semi gloss in family kitchens, as they balance looks with easy day to day care. Higher gloss can work well in smaller spaces that need extra light, provided you are happy to wipe more often.
Cleaning and maintenance
- Use non abrasive cloths or sponges.
- Stick with mild, non caustic cleaners recommended by your resurfacing technician.
- Avoid harsh scourers, bleach heavy products and oven cleaners on the splashback surface.
With this approach, a quality acrylic or polyurethane system can stay looking sharp for many years of normal kitchen use.
Specialist tile and laminate paints within a pro system
What they are
These are not off the shelf household paints. Professional resurfacing uses high adhesion primers and topcoats designed specifically for glazed tiles and smooth laminates, combined as a system.
Why they work for Perth splashbacks
- Strong bonding primers cope with older, glossy tiles that are common in Perth homes.
- Flexible topcoats handle minor movement from temperature changes.
- Fast curing options help kitchens get back into regular use sooner.
Aesthetic appeal
- Creates a uniform colour field over old patterns.
- Can visually soften grout lines, especially in lighter colours.
- Pairs well with resurfaced cabinets and benchtops for a cohesive look, which you can explore further in our guide on benchtop resurfacing for Perth homeowners.
Maintenance considerations
- Very similar to acrylic or polyurethane systems.
- Key is following the care instructions during the first curing period, which sets the foundation for long term performance.
For many tiled splashbacks in Perth, a tile specific resurfacing system offers a strong balance of cost, appearance and durability.
Decorative and specialty finishes
Not everyone wants a plain solid colour. Decorative and specialty finishes give more visual depth while keeping the low disruption benefits of resurfacing.
Common categories include:
- Stone look finishes that mimic subtle marbling or speckling.
- Soft textured looks that suggest concrete or plaster effects (delivered as smooth, cleanable coatings, not rough surfaces).
- Subtle metallic tints for commercial or more dramatic residential spaces.
Why Perth owners choose them
- They sit comfortably with both light and dark benchtops.
- They can help bridge the style gap between existing floors and new cabinet colours.
- They add interest without the maintenance of heavily textured tiles.
Maintenance and practicality
- Most specialty finishes are sealed within the same type of clear or tinted topcoats used on solid colours.
- Cleaning is usually identical to standard resurfaced splashbacks.
- Some multi tone finishes can be more forgiving of small marks between cleans.
These finishes suit Perth homeowners or businesses who want a more individual look without the cost and complexity of designer tiles. If you are exploring broader style ideas, our article on 2026 kitchen resurfacing trends in Perth can help you see how these effects work alongside current local styles.
Laminate and acrylic overlay panels used with resurfacing
In some situations, it makes sense to combine coating based resurfacing with new panels. This is less common for simple splashbacks, but it can be useful when:
- There are small sections that are not suitable for coatings alone.
- You want a specific panel material in one zone and coatings in another, while still avoiding a full renovation.
- You need to cover a difficult join or previous modification.
Laminate panels
- Offer a range of decors from solid colours to wood and stone looks.
- Work best away from direct open flame and within manufacturer heat guidelines.
- Are generally easy to wipe with non abrasive cleaners.
Acrylic panels
- Give a glass like look without some of the weight of actual glass.
- Can be more forgiving to install in tight or awkward spaces.
- Need gentle care to avoid scratches, using soft cloths and suitable cleaners.
These panel options are usually considered on a case by case basis after a site inspection, to ensure they suit your cooktop type, clearance and building layout.
Matching materials and finishes to Perth’s climate and lifestyle
Perth conditions affect how splashback materials perform. Heat, dry air, and the way many homes use open plan layouts all play a role.
Handling heat and steam
- Acrylic and polyurethane coatings are formulated to tolerate typical cooktop heat and steam when manufacturer clearances are respected.
- Tile and laminate systems are also designed for hot, moist environments, provided a rangehood or exhaust is used as normal.
- Panel overlays must be selected and installed with clearances and appliance types in mind, which your resurfacing provider should review on site.
For Perth homes that see a lot of frying and high heat cooking, a robust coating system, correct clearances and good ventilation are a priority.
Sunlight and open plan spaces
Many Perth kitchens sit in bright, open living areas with plenty of natural light. This affects finish choice.
- Satin finishes reduce glare and help hide day to day marks in very bright rooms.
- Semi gloss can add a gentle lift without making every reflection obvious.
- Gloss works in more controlled lighting or when you deliberately want a reflective feature.
Discuss where direct sunlight hits and how your lighting works at night. That will help you settle on a sheen level and colour that looks good all day, not just in the showroom.
Busy family kitchens and rentals
Perth families and rental properties often put kitchen surfaces through heavy use. In these cases:
- Favor durable coating systems with a clear written warranty for eligible surfaces.
- Choose mid tone colours that are kinder to everyday marks than pure white or very dark shades.
- Opt for satin or semi gloss, which show fewer streaks than high gloss when wiped quickly.
A simple care checklist for tenants or guests, supplied by your resurfacing provider, can help keep the splashback in good shape over time.
How to choose the right finish for your kitchen or commercial space
To narrow down the best material and finish for your splashback, work through this practical framework.
- Confirm the base surface
Identify whether your splashback is tile, laminate, glass or acrylic. This determines which resurfacing systems are suitable. - Clarify how the kitchen is used
Note cooking frequency, style of cooking (for example heavy frying versus light reheating), and who uses the space. High use family and commercial kitchens benefit from tougher coatings and forgiving colours. - Look at light and colour in the wider space
Consider flooring, benchtops, cabinets and natural light. Decide whether you want the splashback to blend quietly or become a subtle feature. - Decide your preferred sheen level
Think about how much maintenance you are prepared for and how reflective you want the surface to be. - Ask for physical samples or a sample board
Viewing colours and finishes in your actual kitchen light is far more accurate than judging from a screen.
Once you have worked through these points, a suitable combination of coating system and finish usually becomes clear. A professional resurfacing specialist can then match products to your splashback type and give you specific care guidelines so the material you choose performs well in Perth conditions.
In the next section, we will step through the typical kitchen splashback resurfacing process, so you know exactly what happens from the first assessment through to the final, cured finish.
The kitchen splashback resurfacing process in Perth, step by step
Knowing what actually happens during kitchen splashback resurfacing helps you plan around it and feel confident about the result. This section walks through a typical professional process in Perth from the first inspection to the final clean up, so you know what to expect at each stage.
Step 1: Initial assessment and quote
Everything starts with a proper look at your existing splashback and surrounding kitchen. The aim is to confirm that resurfacing is suitable and to agree on scope, colour and finish before any work begins.
During this stage, a technician will usually:
- Identify the surface type, for example ceramic tile, porcelain tile, glass, laminate or acrylic panel.
- Check structural soundness, including loose tiles, hollow sounding spots, cracks and movement in the wall.
- Assess moisture and damage, looking at grout, silicone and any visible staining or swelling.
- Review access and layout, including cooktop style, rangehood, power points, window reveals and tricky corners.
- Discuss your goals, such as preferred colour, sheen level, timing and whether other areas like cabinets or benchtops will be resurfaced at the same time.
From this, you should receive a clear written quote and scope of work. If the wall or tiles are not suitable for resurfacing, a reliable provider will explain why and suggest alternatives rather than pushing ahead. If you would like to understand how splashback work can tie in with cabinet updates, you may find our kitchen cabinet resurfacing guide for Perth useful at this stage.
Step 2: Detailed preparation and masking
Preparation is where resurfacing jobs are won or lost. It is not glamorous, but it is what makes the new finish bond properly and last in a working Perth kitchen.
A typical preparation stage includes:
- Clearing the area
You remove small items like kettles, toasters, utensils and decorative pieces from benchtops and nearby shelves. The technician may ask you to pull appliances forward slightly to improve access. - Protecting surrounding surfaces
Benchtops, cabinets, floors, appliances and nearby walls are carefully masked and covered with tape, paper and plastic. This protection keeps overspray, dust and product off the rest of your kitchen. - Heavy duty cleaning and degreasing
Specialist cleaners and degreasers are used to remove built up cooking oils, food residues and cleaning product film. This stage often includes attention to grout lines, corners and edges around power points and rangehoods. - Light sanding or abrasion
Once clean and dry, the surface is lightly abraded with suitable pads or sanding tools. The goal is not to strip the surface, but to create a key for primers and coatings to grip.
Thorough preparation is especially important in Perth kitchens that have seen years of oil based cooking or frequent use of strong supermarket cleaners. Any residue left behind can interfere with adhesion, so a quality technician will not rush this step.
Step 3: Minor repairs and surface correction
With the surface clean and keyed, the next step is to fix small defects so they do not show through the new finish.
This usually involves:
- Filling chips and small holes
Suitable fillers or repair products are used on minor chips in tiles, laminate or panels. Once dry, these spots are sanded smooth to blend with the surrounding surface. - Dealing with hairline cracks
Fine cracks in tiles or grout that are stable, not caused by structural movement, may be filled or bridged with compatible products before priming. - Tidying grout and silicone
Loose, flaky or mould stained grout and silicone is assessed. Light cracks or gaps may be addressed as part of the resurfacing preparation, while more serious issues are flagged for repair before work continues.
Resurfacing is designed to work over sound surfaces. If the technician finds issues beyond minor repairs, such as moving tiles or moisture damage behind the wall, they should pause and discuss options with you. In some cases, a small section may need localised repair or partial replacement before the wider area is resurfaced.
Step 4: Priming for strong adhesion
Once repairs are done and dust is removed, primers are applied. These are chosen to match your splashback material and are critical for long term performance.
Typical primer work includes:
- Application of specialist bonding primers that adhere to ceramic, porcelain, glass, laminate or acrylic as required.
- Careful attention to edges and grout lines so the primer creates a continuous base for the topcoats.
- Controlled drying time following manufacturer guidelines, taking into account Perth’s ambient temperature and humidity.
A good primer locks on to the existing surface and gives the resurfacing topcoat something reliable to grip. This combination is what helps prevent peeling or flaking when the splashback is later exposed to steam and regular cleaning.
Step 5: Applying resurfacing topcoats
After primer has cured, the colour coats are applied. This is the stage most people think of when they picture resurfacing, but it only works well because of all the preparation behind it.
In a professional Perth splashback project, you can expect:
- Spray application in most cases
Technicians usually use spray equipment to lay down even, controlled coats. This helps achieve a smooth, consistent finish without roller texture or brush marks. - Multiple thin coats
Instead of one heavy coat, several thin coats are applied. This approach builds up film strength and reduces the risk of runs, sags or uneven colour. - Attention to tricky details
Extra care is taken around power points, under rangehoods, in corners and near window frames. Good technique avoids heavy build up in these areas while still ensuring full coverage.
You will already have chosen your colour and sheen level at the quoting stage. During application, technicians follow that choice and confirm coverage matches your selection before stopping. If you are coordinating splashback work with other areas, such as cabinets, a provider that offers whole kitchen resurfacing can keep colours consistent across all surfaces. For more on that broader approach, visit our Perth resurfacing specialists overview.
Step 6: Curing and initial care period
Once the final coat is applied, the resurfaced splashback needs time to cure. This curing stage is when the coating hardens and reaches its designed durability.
Most systems involve two key time frames:
- Touch dry time
The surface becomes dry to touch after a set number of hours. At this point, masking can usually be removed with care, and the area can be inspected for finish quality. - Full or near full cure time
Over the next [insert period], the coating continues to harden. During this period, you follow specific care instructions to avoid damage while the surface is still settling.
Typical care guidelines during curing may include:
- Avoiding harsh cleaners, scrubbing pads and anything abrasive.
- Keeping heavy impacts away from the splashback, such as knocking pots against it.
- Using the cooktop with normal ventilation while avoiding prolonged exposure to very high direct heat on the coating, especially in the first [insert period].
Your resurfacing provider should give these instructions in writing and talk them through with you. Following them closely in the early days pays off in the long term, because it helps the coating reach its designed strength.
Step 7: Quality check and finishing touches
As the surface reaches its initial cure, the technician performs a quality check and completes final detailing.
This stage usually covers:
- Removing masking and protection
Tape, plastic and paper coverings are removed carefully to avoid pulling at fresh edges. Benchtops, cabinets and floors are wiped down to clear any light dust. - Inspecting the finish
The resurfaced splashback is checked under good light for runs, missed spots, rough patches or dust nibs. Minor imperfections may be gently de nibbed and touched up if required. - Reviewing edges and joints
The meeting points between splashback and benchtop, cabinets and window frames are inspected. Where necessary and appropriate, fresh silicone may be applied after the coating has reached a suitable stage, to restore a neat, sealed joint.
You should be able to walk the area with the technician, ask questions and confirm you are happy with the finish before they leave. This is also the time to note any specific advice for your kitchen, such as particular cleaning products to avoid or tips for dealing with high heat zones.
Step 8: Handover, warranty and long term care
A professional resurfacing service will not just finish spraying and disappear. There should be a clear handover that covers what you need to know for the life of the splashback.
At this point, you can expect:
- Written care instructions
A simple guide explaining which cleaners to use, what to avoid, and how to handle common situations like food splashes, water spots and accidental knocks. - Warranty details
Information about any workmanship or product warranty that applies, the period covered (often up to [insert length] for eligible surfaces), and what is required from you to keep that warranty valid. - Contact details for questions
Clear information on who to call if you have concerns, see something unusual as the coating cures, or want to book related work in bathrooms, laundries or commercial spaces.
This handover closes the loop on the resurfacing process and sets your splashback up for a long, practical service life. With day to day care, a professionally resurfaced splashback in a Perth kitchen can stay looking fresh for years, while saving you the disruption and expense of a full replacement.
In the next section, we will look at cost considerations and budgeting for kitchen splashback resurfacing in Perth, so you can see how all these steps fit into a realistic project plan for your home or commercial property.
Cost considerations and budgeting for splashback resurfacing in Perth
When you start talking numbers, kitchen splashback resurfacing in Perth comes down to a few core questions. How much work is involved on your particular splashback, what products are being used, and how experienced is the team doing the job. This section breaks those pieces down so you can set a practical budget and avoid bill shock later.
Main factors that influence resurfacing cost
No two splashbacks are exactly the same, even within the same suburb. A straightforward tiled area in good condition will sit in a different price bracket to a large, damaged splashback with tricky access. Below are the key cost drivers to pay attention to when you are planning.
1. Size and layout of your splashback
Size is one of the biggest variables in any resurfacing quote.
In simple terms, more area means more preparation time, more coating and more masking. Instead of guessing, you can look at your kitchen with these points in mind.
- Total surface area
A short splashback behind a freestanding cooker will usually cost less than a long run of tiles that wraps around the room and under cabinets. Providers often estimate based on square metres, but may quote a fixed total once they see the job. - Height of the splashback
Standard height splashbacks are quicker to mask and spray than full height tiled walls that reach the ceiling. Extra height means more ladder work, more masking and more coating. - Number of sections
One straight run is usually more efficient than several separate sections around windows, fridges or nib walls. Each break adds set up time and detailing.
If you want an early ballpark before a site visit, you can measure approximate width and height in metres and sketch the layout. This will help any resurfacer give you a more informed range when you first make contact.
2. Existing material and chosen finish
The surface you already have, and the finish you want, both impact price.
Base material
- Ceramic or porcelain tiles
Very common in Perth. These usually require thorough cleaning and grout preparation, but are often straightforward once soundness is confirmed. - Laminate or compact board
Often quicker to prepare than deeply textured tiles, but need careful degreasing and the right primers for smooth, non porous surfaces. - Glass or acrylic panels
Can be more involved. They require specific adhesion products and extra care to avoid visible imperfections. Not all glass is suitable, which a technician will check during the quote.
Finish type
- Standard solid colour systems
Usually the most budget friendly option. These use proven coating systems in your chosen colour and sheen. - Decorative or stone look finishes
Typically involve extra steps or products, such as multi tone application or clear protective layers. That extra detail often sits at a higher price point than a single colour. - Custom colour matching
If you need a specific colour to align with existing cabinetry or branding, there may be mixing or matching costs built into the quote.
When you receive quotes, ask which system is being used and whether there are optional finish upgrades that influence the final figure. That way you know what you are paying for, not just the end result.
3. Condition of your existing splashback
Condition can be the difference between a simple refresh and a more involved repair job.
Resurfacing works best over stable, sound surfaces. The more issues the technician needs to correct before coating, the higher the labour component will be.
Common condition factors that affect cost include:
- Loose or hollow tiles
If tiles move when pressed or sound hollow when tapped, there may be underlying adhesive or substrate problems. Local repairs can sometimes be managed, but widespread issues may push you toward replacement rather than resurfacing. - Cracks and chips
Small chips and fine cracks that are not structural can be filled and sanded as part of prep. Heavier damage, especially around windows or benchtop joins, adds time and may require more specialist repair work. - Grout and silicone condition
Minor grout staining is normal. However, crumbling grout, missing sections or old silicone with visible mould often need extra attention. Some of this can be addressed during prep, but if there is deeper moisture damage, costs can climb or resurfacing may be paused until repairs are done. - Previous DIY paint jobs
Existing non professional coatings introduce risk. They may not bond properly to the original surface and can lift under new products. Removing or stabilising these old layers adds time and care, which affects price.
It is worth being upfront about any history your splashback has, including past painting or repairs. This helps the resurfacing provider price the work accurately instead of discovering surprises on day one.
4. Labour, access and site conditions
Labour cost is not just about the square metres. Site specific factors in Perth homes and commercial properties can affect how long a job takes and how many people are needed on site.
- Access to the splashback
Clear open benchtops and good working room let technicians move quickly and safely. Tight spaces, awkward corners, and built in items right against the splashback take more time to mask and reach. - Height and ladder work
Full height tiling or very tall ceilings may need ladders or small platforms, which slows the work and increases the care needed around edges and joins. - Parking and building access
In multi unit buildings, city locations or commercial complexes, time can be spent moving equipment through lifts, corridors and loading docks. This extra handling is usually factored into commercial pricing. - Coordination with other trades
If resurfacing needs to be staged around electricians, plumbers or cabinet installers, there may be extra visits or down time between stages. Your quote may reflect that coordination.
Before quoting, a good provider will ask about parking, building rules, hours they can work, and whether they need to protect common areas. For commercial jobs, it helps to provide building management requirements early so this time is priced in clearly.
5. Warranty, quality level and provider expertise
Not every quote covers the same quality of work. A lower number can look tempting until you unpack what sits behind it.
When comparing quotes, ask about:
- Experience and training
How long the team has been resurfacing kitchens locally and how they train staff. Local Perth experience matters, because products behave differently in our climate. - Products used
Whether they use trade grade systems designed for kitchen and bathroom use or generic paints and primers. Cheaper products may look fine on day one but fail sooner under steam and regular cleaning. - Scope clarity
What is specifically included, and what costs extra. For example, is grout repair part of the quote or a separate item. Is silicone removal and replacement priced in or excluded. - Written warranty
Whether you receive a written warranty on workmanship and coatings for eligible surfaces, and how long that coverage lasts, such as up to [insert period]. Also ask what is required from you, for example using recommended cleaners.
You can learn more about how a professional resurfacing business should communicate its values and standards in our introduction at Our Values, which outlines the approach behind quality driven work.
Higher quality work with a proper warranty will usually cost more than a bargain quote that offers little detail. The difference often shows up a few years later, when a well done splashback still looks tidy while a rushed job is ready for repair.
How to set a realistic resurfacing budget
A clear budget helps you prioritise and avoid cutting corners where it counts.
Rather than guessing, you can follow this simple budgeting framework for your Perth splashback.
- Define your total project scope
Decide if you are resurfacing only the splashback, or also cabinets, benchtops, bathroom tiles or a laundry. Bundling areas can change pricing, because travel and set up time is shared across more surfaces. If you are considering a broader refresh, our article on kitchen upgrades in Perth at kitchen resurfacing options can help you think through combinations. - Set a comfortable spend range
Decide a budget band rather than a single hard number, for example from [insert lower range] to [insert upper range]. This gives you room to choose a higher quality finish or include minor repairs if needed. - Rank what matters most
List what is most important to you out of appearance, durability, minimal disruption, warranty length and timing. You may decide you are happy with a mid range decorative finish if it means using a provider with strong local experience and good communication. - Allow a contingency
Keep a small percentage of your budget aside for unexpected findings, such as hidden cracks behind an appliance or extra repair work once masking is removed. Label this as a contingency amount so you are prepared without stress. - Get at least two detailed quotes
Ask each provider for a written scope that breaks out preparation, repairs, coating system, finish type and any optional extras. This lets you compare like for like instead of just comparing bottom line numbers.
With this framework, you can see clearly where your money is going and make informed trade offs, rather than defaulting to the cheapest line on a spreadsheet.
Balancing cost with quality outcomes
Saving money is only helpful if the finish holds up and looks good in your kitchen or commercial space. Cutting the wrong corners often leads to a second spend down the track.
When you are weighing quotes and options, keep these guidelines in mind.
- Do not skip preparation
Any offer that suggests minimal cleaning or sanding to save time is a red flag. Preparation is non negotiable if you expect the coating to bond well and last in Perth conditions. - Be wary of very short time promises
Splashback resurfacing can be efficient, but if a quote suggests the entire process, including prep, coating and curing, can be pushed into an unrealistically short window, question what is being compressed. - Check what “warranty” really means
A vague promise is not the same as a clear, written warranty with defined terms. Ask how long the warranty lasts, such as up to [insert period], what it covers, and how to make a claim if needed. - Value communication and planning
Clear scheduling, respect for your property, and straightforward explanations are part of quality. These things cost time, but they also reduce stress and reduce the risk of misunderstandings.
You are not just buying a new colour, you are paying for skill, process and follow through.
Budgeting for homeowners vs commercial properties
Residential and commercial resurfacing in Perth share the same technical base, but budgeting priorities can differ.
Perth homeowners
- Often work with a fixed household budget and want the best visual improvement within that figure.
- May stage work, starting with the splashback and adding cabinets or benchtops later.
- Value warranties and long term durability because they plan to live with the result daily.
For homeowners, it often makes sense to spend a little more on a trusted provider and proven system, instead of shaving costs with no clear warranty or process.
Commercial property managers and business owners
- Look at both upfront cost and the impact of downtime on staff or customers.
- Need predictable quotes and scopes to present for approval.
- Often prefer one contractor who can handle several areas within a building, which can improve value through efficient scheduling.
Commercial budgets should factor in after hours or staged work, building access procedures and required insurances. These legitimate costs support safe, compliant work, which is just as important as the coating itself.
When resurfacing might not be the cost effective choice
Honest budgeting includes knowing when not to proceed. Resurfacing may not be the best use of money if:
- Large sections of the splashback are structurally compromised, for example multiple loose tiles or swollen board.
- You plan a full layout change in the short term, such as moving appliances or knocking out walls.
- There is recurring moisture damage that has not been investigated or repaired.
In these cases, it can be smarter to direct your funds into more extensive repair or replacement work, then consider resurfacing later on other surfaces that are still sound, such as bathroom tiles or a laundry. That way your budget goes into fixing causes, not just covering symptoms.
Using quotes as a planning tool, not just a price check
When you request quotes for splashback resurfacing in Perth, treat them as planning documents, not just numbers. A good quote helps you understand:
- What preparation and repairs are needed on your specific splashback.
- Which coating system is proposed and why it suits your kitchen or commercial space.
- How long the work will take, from first day on site through to safe, normal use.
- What care is expected from you to maintain the finish and warranty.
If a quote leaves these points vague, ask for clarification. A provider that can explain their pricing and process clearly is usually a safer bet for your budget and your kitchen.
In the next section, we will look at how to choose a professional resurfacing service in Perth, including the questions to ask and the signs that a provider takes both quality and your budget seriously.
Choosing a professional resurfacing service in Perth
Kitchen splashback resurfacing is only as good as the people and process behind it. The right products help, but careful preparation, honest advice and clear communication make the real difference to how your splashback looks and how long it lasts in a Perth kitchen or commercial space.
This section gives you a practical checklist for choosing a resurfacing provider in Perth, without needing to rely on case studies or testimonials. You can use these criteria whether you are updating a single home kitchen or coordinating work across several commercial sites.
1. Check experience and technical know‑how
You want a team that understands resurfacing, not just general painting.
Resurfacing is a specialised trade. It involves chemistry, surface preparation, spray technique and good judgment about when resurfacing is suitable and when it is not.
When you speak with a provider, look for signs that they:
- Focus on resurfacing as a core service
They can clearly explain the difference between resurfacing and standard painting. They talk about primers, adhesion, curing and suitable substrates, not just “we paint over tiles”. - Have specific experience with Perth kitchens and wet areas
They understand local building styles, from older brick homes to newer units and commercial fitouts. They can explain how Perth’s climate affects curing and product choice. - Use a consistent, documented process
They can walk you through their step by step method, from cleaning and masking to priming, coating and curing. The explanation feels practiced and clear, not vague.
If you want a feel for how a quality resurfacing business thinks and operates, you can read more about our approach at About Us, which outlines our background and the principles we use on Perth projects.
2. Confirm licences, insurance and product systems
Basic paperwork is a non negotiable.
In Western Australia, not every resurfacing task needs the same formal licence as structural building work, but you should still expect a professional approach to compliance and safety.
Ask the provider to confirm:
- Business registration and insurance
They should hold current public liability insurance at a level suitable for the size of jobs they do. If they work in commercial buildings, ask if their cover meets building management requirements. - Use of recognised product systems
They should be able to name the coating systems they use and explain why those systems suit kitchens and wet areas. You are looking for products that are designed for tiles, laminates or panels, not general house paint. - Product compatibility
They should ask about, or test for, any previous coatings on your splashback. This shows they are thinking about adhesion and compatibility rather than just spraying over whatever is there.
You do not need brand names for every layer, but you do need proof that a proper system is in place, not random products combined on the fly.
3. Look for process transparency, step by step
A reliable resurfacer is happy to explain how they will handle your specific splashback, including what is and is not included.
Ask them to talk you through their process in your kitchen or commercial space. They should be able to describe, in plain language:
- Preparation
How they will clean, degrease, sand or abrade the existing surface, and how they will protect benchtops, cabinets, floors and appliances. - Repairs
What level of chip repair, crack filling and grout tidy up is included, and what would count as additional repair work outside the quote. - Priming and coating
How many coats they expect to apply, which application method they use, and how they manage tricky areas like power points and rangehoods. - Curing and access
How long the coatings need before light use and before full normal use, and what you can and cannot do during that period.
If they cannot clearly explain their own process, that is a warning sign. Transparent providers know their method well and are comfortable sharing it.
4. Insist on clear, itemised quotations
A good quote is more than a single number.
You should receive a written quote that makes it easy to see what you are paying for. This protects both you and the resurfacing business and reduces misunderstandings once work starts.
Look for a quote that spells out:
- Scope of work
Which areas are being resurfaced, for example kitchen splashback only, or splashback plus a section of adjacent tiling. The quote should describe the surfaces and approximate sizes. - Preparation and repairs included
A summary of cleaning, masking and light repairs that are part of the price, such as filling small chips and addressing minor grout issues. - Coating system and finish
The type of system proposed, for example tile specific resurfacing coatings, and the finish you have selected, such as solid colour in satin or semi gloss. - Exclusions and potential extras
Items that are not included, such as major structural repairs, moving power points, or dealing with heavy water damage. Any known potential variations, like addressing hidden defects, should also be mentioned. - Timeline and access requirements
An estimated on site duration, broad curing timeframes, and any access needs, such as off street parking or building lift use.
Clear quotations make it easier to compare providers and avoid the “but I thought that was included” conversations that can damage trust.
5. Test communication and customer service
The way a company communicates early on is often how they will communicate throughout the job.
Pay attention to:
- Responsiveness
How quickly they reply to enquiries and how clearly they answer your questions. Occasional delays can happen, but consistent slow or vague replies are not a good sign. - Clarity and honesty
Whether they are comfortable saying “no” when resurfacing is not suitable, or when they need more information. Honest caution is more valuable than a quick yes to everything. - Respect for your property
During site visits, do they remove shoes if requested, take care moving around your kitchen, and show basic respect for your home or workplace.
For commercial property managers, you may also want to know how they handle site inductions, sign in procedures and communication with building management. Reliable providers are used to working within these frameworks and will not treat them as an afterthought.
6. Understand their approach to warranties and aftercare
Resurfacing does its job longest when the installer and the owner both play their part.
A professional Perth resurfacing service should:
- Offer a written warranty
For eligible splashback surfaces, they should provide a written warranty on workmanship and coatings for a set period, such as up to [insert length]. This document should spell out what is covered and what is not. - Provide clear care instructions
They should give you a simple written guide to cleaning and day to day care, including recommended products and things to avoid. - Explain what could void the warranty
For example, using harsh abrasive cleaners, cutting into the coating, or exposing the splashback to heat sources outside the recommended clearances.
Ask how warranty claims are handled if something does go wrong. You want to know who to contact and what steps they will take to assess and address any issues.
7. Use practical checks instead of relying on stories
Since we are not using testimonials or case studies here, you can still check a resurfacing provider’s expertise with practical, fact based questions and simple observations.
Useful questions include:
- “What makes a splashback unsuitable for resurfacing?”
Look for answers that mention loose tiles, structural movement, severe moisture damage or ongoing leaks. If they say they can resurface anything, treat that with caution. - “How do you handle previously painted tiles?”
You want to hear about testing, removing loose old coatings, and ensuring new products bond properly, not just spraying straight on top. - “What do I need to do before you arrive?”
Professional teams will give you a short, clear list, such as clearing benchtops, moving small appliances and providing access to power and water. - “What are the most common mistakes people make after resurfacing?”
Look for answers about cleaning too aggressively, using harsh chemicals too soon, or placing hot pans directly against the splashback while it is still curing.
As you talk with a provider, notice whether answers are consistent, specific and practical. That steady consistency is a more reliable guide than any single story or claim.
8. Match the provider to the size and type of your project
Not every resurfacing business is set up for the same kind of work. Matching provider to project helps you get better service and more accurate pricing.
For Perth homeowners
Look for a provider that:
- Regularly handles residential kitchens and bathrooms.
- Is comfortable working in occupied homes, with kids, pets and day to day life going on.
- Offers coordinated services if you plan to add cabinets, benchtops or bathroom tiles later, so you do not have to start from scratch with someone new.
If you are thinking about future work beyond the splashback, you can get a feel for the broader services on offer in our articles at Latest News, where we discuss different resurfacing projects around Perth.
For commercial property managers and business owners
Focus on providers who can:
- Work within building rules, including inductions, insurances and after hours access.
- Stage projects to keep parts of your facility operational.
- Communicate clearly with multiple stakeholders, for example your tenants, building management and internal teams.
Ask if they have experience in offices, hospitality settings or multi unit complexes. The technical work is similar to residential, but logistics and expectations are different.
9. Red flags to watch for
As you narrow down your shortlist, keep an eye out for warning signs that suggest you may not get the quality or professionalism you expect.
- Very vague or verbal only quotes
If they will not put details in writing, it is hard to hold anyone to account for scope, price or timing. - Reluctance to discuss preparation
Anyone who plays down preparation, or treats it as a minor step, is less likely to deliver a finish that lasts. - Pressure tactics
Heavy discounting for “today only” bookings or pushing you to skip a site assessment should set off alarm bells. Good operators give you space to think. - No mention of aftercare
If they say “just clean it like normal” without any specifics, they may not be experienced with how coatings behave in real Perth kitchens.
If you see more than one of these red flags, it may be worth stepping back and seeking other quotes before you commit.
10. A simple selection framework for Perth owners
To choose a resurfacing service with confidence, work through this short framework.
- Shortlist providers
Identify a small number of businesses that specialise in resurfacing and service your part of Perth. - Request site visits and written quotes
Have them inspect your splashback, explain suitability, and provide itemised quotations. - Compare scope and clarity
Check that each quote explains preparation, repairs, coating systems, finish, timing and exclusions. - Test communication
Pay attention to how they answer questions about process, aftercare and what happens if something goes wrong. - Balance price with confidence
Choose the provider that gives you clear information, a realistic schedule, a written warranty and a fair price, even if that is not the absolute lowest number.
When you follow these steps, you put yourself in a strong position to get a splashback resurfacing job that looks good, stands up to Perth conditions and respects your home or business. In the next section, we will look at how to maintain your resurfaced splashback so it keeps performing for the long term.
Maintenance and longevity of resurfaced kitchen splashbacks in Perth
A professionally resurfaced splashback is built to handle real Perth kitchens, but like any finish, it needs the right care to reach its full lifespan. The good news is that maintenance is straightforward. With a few simple habits and a basic understanding of what to avoid, you can keep your splashback looking sharp for years and protect your warranty.
How long should a resurfaced splashback last?
There is no single “expiry date” because every kitchen is used differently. Longevity depends on:
- Quality of preparation and products, including how well the surface was cleaned, primed and coated.
- How the kitchen is used, for example light reheating versus daily heavy frying.
- Cleaning habits, especially whether you use gentle products or harsh abrasives.
- Exposure to heat and moisture, such as proximity to high heat burners without a rangehood.
When resurfacing is done correctly and you follow the care instructions, many Perth homeowners see their splashbacks stay in good condition for a long, practical service life. Reputable providers usually back their work with a written warranty on eligible splashbacks for up to [insert period], which is a good reference point for expected performance.
If you are interested in how similar resurfaced surfaces hold up, you can read more about lifespan and care for other kitchen areas in this article on how long kitchen cabinet resurfacing lasts in Perth.
Everyday cleaning routine for resurfaced splashbacks
The key rule is gentle, regular cleaning with non abrasive products.
Because resurfacing coatings create a sealed, smooth finish, you rarely need harsh scrubbing. A light, consistent routine works best.
Recommended cleaning tools
- Soft microfibre cloths
- Soft non scratch sponges
- Clean, damp cloths for rinsing and wiping off cleaner residue
Suitable cleaning products
Your resurfacing provider should give you product recommendations at handover. As a general guide, you will usually be safe with:
- Mild, pH neutral dishwashing liquid diluted in warm water
- Non caustic, non abrasive spray and wipe products that do not contain bleach or ammonia
- Specific cleaners listed in the care instructions supplied with your resurfaced splashback
Cleaning method checklist
- Wipe fresh splashes promptly
After cooking, allow hot splashes to cool slightly. Wipe them away with a damp cloth as soon as practical. This prevents staining and reduces how strong your cleaners need to be. - Use a mild cleaner for regular wipe downs
Spray a small amount of your approved cleaner onto a cloth (not directly onto the wall) or dip your cloth in diluted dishwashing liquid. Gently wipe the splashback in smooth strokes. - Rinse and dry
Follow with a clean damp cloth to remove any cleaner residue, then dry with a microfibre cloth. This helps avoid streaks and water spots, especially on darker or glossier finishes. - Schedule a light weekly clean
Even if you do not cook heavily every day, a quick weekly wipe stops film building up and keeps the surface performing as intended.
Gentle, frequent cleaning is better than harsh, occasional scrubbing.
Products and tools to avoid
Certain products and tools can damage resurfacing coatings or shorten their life. Avoiding these is one of the easiest ways to protect your splashback and warranty.
Avoid these cleaning products
- Bleach based cleaners or heavy duty mould killers
- Oven cleaners or grill cleaners
- Highly caustic degreasers
- Ammonia based glass cleaners used regularly on the coating
- Strong solvent based cleaners not approved by your resurfacing provider
Avoid these tools and actions
- Abrasive scourers, steel wool or green pads
- Scraping with knives, metal spatulas or razor blades
- Using aggressive “magic” eraser blocks on textured or darker surfaces without checking with your provider
- Pressure washing the splashback
Using these products or tools can cause fine scratching, dull patches or even lift sections of coating, especially if the splashback is still within its early curing period. If you are unsure about a cleaner, check it against the instructions you received at handover or contact your resurfacer for confirmation.
Heat, steam and moisture: using your kitchen wisely
Resurfaced splashbacks are designed to cope with normal Perth cooking, but they are still coatings. Respecting heat and moisture guidelines will extend the life of the finish.
Heat management
- Respect minimum clearances
Your cooktop and splashback should already meet recommended clearances. Avoid installing new high output burners closer to the splashback than manufacturer guidelines allow. - Use a rangehood or exhaust fan
Run your rangehood while cooking on the stovetop and for a short time afterwards. This helps remove steam, oil vapour and heat, which benefits both the coating and your whole kitchen. - Reduce open flame contact
Avoid leaning pans back against the splashback where open flame or intense radiant heat can focus on one area of coating.
Moisture and steam
- Wipe condensation or heavy splashes from boiling pots when you notice them.
- Do not leave the area constantly wet. Regular drying after cleaning helps keep joints and edges sound.
- If you see persistent moisture around silicone or grout lines, investigate the source instead of ignoring it.
Using your kitchen with this level of care does not slow you down. It simply reflects the way a professional would treat any finished surface in a working kitchen.
Early curing period: special care right after resurfacing
The first [insert period] after resurfacing is important. The coating continues to harden and reach its full strength in this time.
During the early curing period you should:
- Follow any specific timeframes given by your resurfacer for light use and full use.
- Avoid heavy cleaning. If you need to clean, use only mild soap and water with very light pressure.
- Keep abrasive tools away from the splashback, even if you just want to “quickly remove” a mark.
- Be cautious with high heat cooking directly against the coating, especially long simmering or wok style cooking on back burners. Use good ventilation and avoid prolonged close contact.
Think of the curing period as giving your splashback its best start. A little extra care now usually pays off in extra years of reliable performance.
Common post resurfacing issues and how to handle them
Even with good workmanship and care, you might notice small issues over time. Knowing what is normal, what you can manage yourself and when to call your resurfacer helps you respond calmly and effectively.
1. Light surface marks or streaks
What it looks like: Faint streaks or light marks that appear after cleaning or when the light hits the splashback at a certain angle.
Likely causes:
- Residual cleaning product left on the surface
- Using too much cleaner or not rinsing properly
- Natural variation in sheen, especially in strong Perth sunlight
What to do:
- Re clean the area with a damp microfibre cloth and diluted dishwashing liquid.
- Rinse thoroughly with clean water and dry carefully.
- If streaks persist in the same pattern, check your cleaner. You may need to switch to a simpler product recommended by your resurfacer.
2. Fine scratches
What it looks like: Very shallow, hairline scratches visible at certain angles, often from contact with rough items or abrasive pads.
Likely causes:
- Using a scouring pad or rough cloth
- Dragging metal utensils or appliances along the surface
- Repeated contact with hard, sharp edges during cleaning
What to do:
- Stop using the tool or cleaner that caused the marks.
- In mild cases, fine surface marks become less noticeable once you adopt gentle cleaning habits.
- If scratches are obvious and recent, contact your resurfacer. They can advise whether they are purely cosmetic or if a site visit is needed.
3. Chipping at edges or high contact points
What it looks like: Small chips or missing coating around benchtop edges, corners or near power points.
Likely causes:
- Direct impact from hard objects, for example hitting the edge with a heavy pot
- Repeated rubbing or knocks at a specific point
- Movement in the substrate that stresses one small area
What to do:
- Do not pick at or enlarge the chipped area.
- Take clear photos and note when you noticed the damage.
- Contact your resurfacer to discuss whether it falls under workmanship warranty, impact damage, or general wear. In many cases, small chips can be carefully repaired.
4. Peeling or lifting
What it looks like: Sections of coating lifting away from the surface, bubbling or peeling, particularly near edges or grout lines.
Likely causes:
- Contamination on the original surface that interfered with adhesion
- Incompatible previous coatings underneath
- Severe moisture issues or movement in the wall
- Incorrect use of harsh chemicals that break down the coating
What to do:
- Stop cleaning or picking at the affected area.
- Document the issue with photos and timing.
- Contact your resurfacing provider promptly. Lifting is not normal wear and needs professional assessment.
If the issue is related to product or preparation, it may be addressed under warranty. If it is linked to water leaks, building movement or aggressive chemicals, you will need to manage the cause to prevent a repeat problem.
5. Discolouration or stains
What it looks like: Yellowing, dull patches, dark marks or stains that do not come off with standard cleaning.
Likely causes:
- Prolonged exposure to strong dyes or food acids
- Use of harsh cleaners that change the surface
- Long term heat exposure in one area without enough ventilation
What to do:
- Try a gentle clean with approved products as per your care guide.
- If marks persist, avoid experimenting with stronger chemicals.
- Contact your resurfacer with photos. They can advise whether this is cosmetic wear, chemical damage or something that might be treatable.
Routine checks to maximise lifespan
A quick visual check every few months can catch small issues early, when they are easier and cheaper to fix.
Include these points in your routine:
- Inspect grout lines and joints
Look for gaps, cracking or missing silicone where the splashback meets benchtops, windows and cabinets. Addressing small gaps early helps keep moisture away from the substrate. - Check around power points
Make sure there are no cracks or lifting edges. This area sees more handling and can reveal early movement. - Review high heat zones
Look behind your most used burners for any dulling or colour shifts. Improve ventilation or adjust cooking habits if you notice concentrated wear. - Watch for new moisture patterns
If you see persistent damp patches or mould at joints, investigate potential leaks or condensation problems before they spread.
Catching these signs early and seeking advice gives you much more control over the long term condition of your resurfaced splashback.
Maintaining warranty and professional support
Warranty coverage for resurfaced splashbacks depends on both the quality of the original work and how you look after the surface.
To keep your warranty valid, you will usually need to:
- Follow the written care instructions supplied at handover, especially during the first [insert period].
- Use approved or recommended cleaners and avoid chemicals that are specifically listed as unsuitable.
- Report any unusual behaviour promptly, such as widespread peeling or bubbling, rather than continuing as normal for months.
- Avoid DIY repairs with hardware store paints or fillers, which can make professional assessment and rectification harder.
If something does not look right, contact your resurfacing provider directly. A business that stands behind its work will explain the next steps clearly and outline whether an inspection is needed.
For homeowners and commercial property managers who want tailored advice about ongoing care or future projects, it can help to speak with a local team that works on Perth kitchens every week. You can reach out for guidance or a fresh quote through our Contact Us page.
Key habits that keep resurfaced splashbacks looking good
To bring it all together, here is a simple habit list you can stick on the inside of a cupboard door.
- Wipe food and oil splashes soon after cooking.
- Clean weekly with a soft cloth and mild, non abrasive cleaner.
- Use your rangehood whenever you cook on the stove.
- Avoid abrasive pads, bleach, oven cleaners and harsh chemicals.
- Do not knock heavy pots or pans against the splashback.
- Check joints, grout and silicone a few times a year.
- Follow your resurfacer’s curing and care instructions, especially in the first [insert period].
These small steps are usually all it takes to protect your resurfacing investment and keep your Perth kitchen looking fresh without the cost and disruption of frequent renovations.
Additional refresh options to pair with splashback resurfacing
Kitchen splashback resurfacing often works best as part of a broader, low disruption refresh. If your splashback is looking better than the rest of the room, it might be time to look at other surfaces that can also be resurfaced instead of replaced.
This section gives you a practical overview of four common options Perth owners and commercial managers consider alongside splashback work:
- Cabinet resurfacing
- Benchtop refinishing
- Tile resurfacing in kitchens, bathrooms and laundries
- Bath and bathroom fixture resurfacing
The aim is a coordinated, cost aware upgrade that respects your existing layout and keeps disruption low.
1. Cabinet resurfacing for a cohesive kitchen look
Once your splashback looks fresh, older cupboard doors and drawer fronts often stand out. Cabinet resurfacing lets you update colour and finish on existing joinery without ripping it out.
What cabinet resurfacing involves
For most Perth kitchens, cabinet resurfacing focuses on:
- Doors and drawer fronts, which carry most of the visible impact
- End panels, kicks and trims, so the whole bank of cabinetry matches
- Occasional open shelves and feature panels, if they are part of the visible run
The process is similar in principle to splashback resurfacing, with extra attention to moving parts and edges.
- Thorough cleaning to remove kitchen grease and polish residues.
- Light sanding and deglossing of existing finishes.
- Filling of small dents, chips and old handle holes where needed.
- Application of primers suited to timber, laminate or vinyl wrap, depending on the base.
- Spray application of durable cabinet coatings in your chosen colour and sheen.
Why it pairs well with splashback resurfacing
- Colour coordination
You can tie cabinet colours to your new splashback for a calm, unified look, instead of trying to match old timber stains or dated tones. - Visible impact for the cost
Cabinets occupy a lot of visual space. Updating both splashback and cabinetry often makes the room feel almost new, even if you keep the same layout and appliances. - Consistent finish quality
Using one resurfacing team for both splashback and cabinets gives you aligned sheens and colours that sit well together, rather than piecing together different trades and products.
Where cabinet resurfacing works best
- Kitchens where doors and drawers are structurally sound but cosmetically tired.
- Rental properties where you want better presentation without full replacement joinery.
- Commercial tea rooms or staff kitchens that need a professional look without a full fitout.
If you are considering this option, it is worth reading more about cabinet respraying and what to expect from that process in our separate article at uncover the benefits of respraying kitchen cabinets.
2. Benchtop refinishing to modernise work surfaces
Benchtops cop heavy use in both homes and commercial spaces. Many older laminates or dated colours can let the whole kitchen down, even if they are still structurally fine. Benchtop refinishing updates the visible surface so it matches your refreshed splashback and cabinets.
What benchtop refinishing looks like
Similar to splashback work, benchtop refinishing usually involves:
- Degreasing and thorough cleaning of the existing top
- Careful sanding or abrasion to key the surface
- Filling of minor chips and worn edges
- Application of specialist primers for laminate or existing coatings
- Multiple coats of a hard wearing benchtop system, often in stone look or solid colours
In many cases, benchtop coatings are formulated for horizontal surfaces that see more direct impact and abrasion than walls or cabinet doors.
Design advantages
- Stone look finishes that sit well with plain resurfaced splashbacks
- Neutral solid colours for modern, simple kitchens and commercial spaces
- Sheen options that work with your lighting and cleaning habits
When you line up benchtop, splashback and cabinet colours together, it is easier to create a balanced palette that feels intentional rather than piecemeal.
Practical benefits
- Avoids demolition of benchtops that are still structurally sound.
- Reduces disruption to sinks and cooktops that would need reconnection if replaced.
- Often faster and less messy than full benchtop replacement.
Benchtop refinishing can work in both domestic and light commercial settings, provided the correct system is chosen and care instructions are followed. For laundries, a similar approach can help achieve a consistent look across wet areas, which we discuss in more detail in our piece on resurfacing your laundry as a budget option.
3. Tile resurfacing in bathrooms, laundries and adjacent areas
Once you see what resurfacing can do for a kitchen splashback, it often makes sense to apply the same logic to other tiled areas of your property. Many Perth homes have sound but dated tiles in bathrooms, laundries and WC areas that visually connect with the kitchen.
Where tile resurfacing makes sense
- Bathroom walls with dated colour schemes or stained grout but no major structural damage.
- Laundry splashbacks and walls that are clean but mismatched with your updated kitchen surfaces.
- Toilet or powder room walls where cosmetic refresh provides quick visual uplift.
By resurfacing these tiles, you can pull multiple wet areas into the same colour family, which makes your home feel more cohesive and helps if you are preparing for sale or presenting to tenants.
How tile resurfacing works outside the kitchen
The basic steps are similar to splashback work, with some added attention to water exposure:
- Cleaning and degreasing tiles and grout to remove soap scum and residues.
- Light abrasion of glossy glaze to help primers bond.
- Repair of minor chips and tidy up of grout where appropriate.
- Application of tile primers and coatings suited to wet environments.
Showers and heavy wet zones may have different suitability conditions and care requirements to kitchen walls. A thorough assessment is important before committing to a plan.
Benefits of including tiles in your refresh plan
- Visual continuity, so your kitchen, bathroom and laundry feel like parts of the same home rather than separate eras.
- Budget control, especially when large tile areas can be resurfaced instead of replaced.
- Lower disruption, with reduced demolition and less risk of exposing old substrates.
For homeowners wanting a quick, tidy improvement in bathrooms without a full overhaul, tile resurfacing and compatible bathroom services are outlined further in our article on quick and easy bathroom resurfacing.
4. Bath and bathroom fixture resurfacing
Old baths, shower bases and surrounding tiles often show age through colour, surface wear or staining, even when they still function. In many Perth properties, the bath is structurally fine but visually lets the bathroom down.
What bath resurfacing covers
Professional resurfacing can be applied to:
- Built in baths with worn or discoloured surfaces
- Older coloured baths that do not match updated wall and floor finishes
- Some shower bases or surrounds, depending on material and condition
The aim is to renew the surface so it suits your current style and is easier to keep clean, while avoiding the cost and disruption of removing a bath and re tiling around it.
Why baths and splashbacks are often done together
- Both are visible, high use wet surfaces that anchor how a room feels.
- Aligning colours between kitchens and bathrooms creates a consistent feel through the home.
- Coordinating work helps you manage access and curing times efficiently.
Considerations before resurfacing baths
- The underlying bath must be structurally sound without major flex or cracks.
- Existing chips or rust spots need proper preparation before resurfacing.
- You will need to follow specific curing and cleaning instructions to protect the new finish.
A well planned bath resurfacing project can be a fast, tidy way to lift a bathroom in step with your resurfaced kitchen splashback and tiles.
5. How to plan a whole home or multi area refresh
If you want more than just a new splashback, the key is to plan your projects in a logical order that suits your budget, timing and level of disruption you can manage.
Step by step planning framework
- List all the surfaces you would like to improve
Include splashbacks, cabinets, benchtops, bathroom tiles, baths, and laundries. Mark each as either “cosmetic” or “structural concern” so you can see where resurfacing fits and where replacement may be better. - Decide your priority zones
For many Perth owners, the main kitchen comes first, followed by bathrooms and laundries. Commercial managers might focus on staff kitchens and customer facing amenities. - Group compatible work
Try to group splashbacks, cabinets and benchtops together if they share colours and curing needs. Likewise, group bathroom tiles and baths where possible. This improves efficiency and keeps finishes consistent. - Set a staged or single phase budget
Choose whether you will tackle everything in one project or over [insert number] stages. Set a spend range for each stage so you stay in control. - Talk through the plan with your resurfacing provider
Explain your priorities, timing constraints and long term goals. A provider used to multi area work can suggest a sequence that reduces downtime and keeps costs transparent.
Approaching upgrades this way helps you avoid mismatched colours, repeated disruption and ad hoc decisions driven by short term pressure.
6. When resurfacing is the right choice across multiple areas
Resurfacing works well across several surfaces in the same property when:
- Existing materials are sound but look dated or stained rather than structurally failed.
- You are keeping your layout, so joinery, plumbing and walls stay where they are.
- You value low disruption, especially if you live in the home or run an active business on site.
- You prefer consistent finishes, using one team and one set of colour decisions instead of coordinating multiple trades.
If, on the other hand, you plan to move walls, change plumbing or replace failing substrates, it can be better to complete that structural work first, then use resurfacing strategically to control costs on tiles, cabinets or benchtops in the new layout.
7. Custom requests and special situations
Some Perth properties sit outside the standard kitchen and bathroom pattern. You might have:
- A kitchenette in a granny flat or studio
- A bar area or servery linked to an outdoor space
- Commercial or semi commercial kitchens with specific compliance requirements
- Unique colour or finish requests across different areas
These situations often benefit from a custom approach rather than a generic package. A resurfacing provider who is open to tailored solutions can look at the materials involved, your usage patterns and your end goals, then suggest a combination of services that fits.
If you have a space that does not quite fit the usual categories, it can be helpful to explore what is possible through a more tailored discussion such as the one outlined on our custom requests page.
8. Bringing it all together for your Perth property
The main advantage of pairing splashback resurfacing with other low disruption services is simple. You get a kitchen and bathroom that feel refreshed and coordinated, without the stress, rubble and cost that come with a full renovation.
By combining cabinet resurfacing, benchtop refinishing, tile resurfacing and select bathroom work, you can:
- Work largely within your existing layout
- Keep kitchens and bathrooms usable for most of the project
- Control budget by focusing on surfaces rather than structure
- Achieve a consistent, modern look throughout your home or business
If you are ready to explore how these options might look in your own property, the next practical step is to speak with a Perth based resurfacing specialist, walk through your spaces and map out a staged plan that matches your priorities, timing and budget.